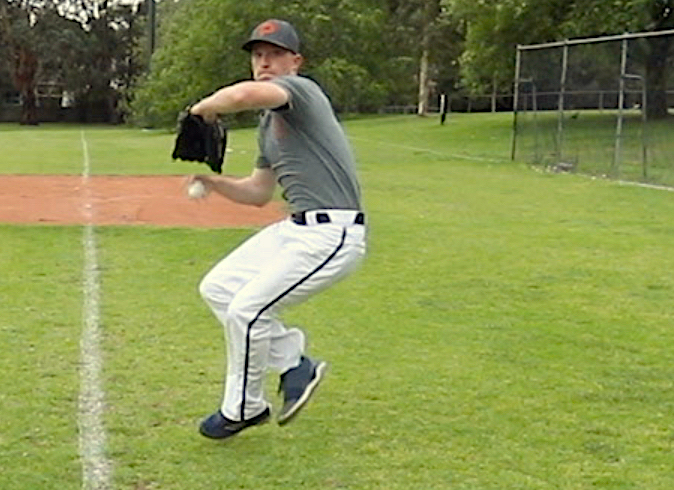
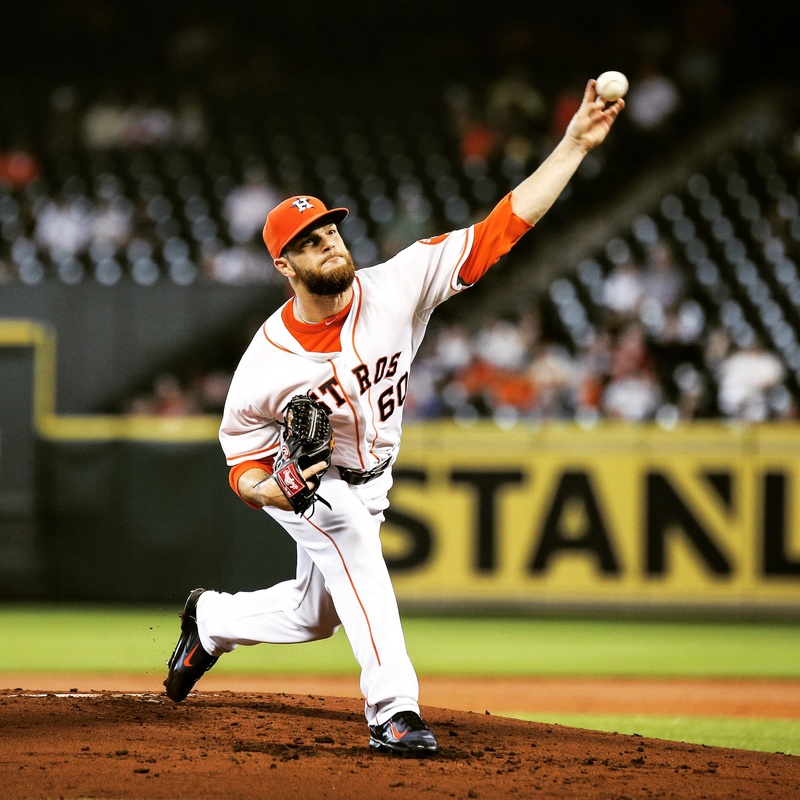
Rotation, Mobility and Stability Screening in Baseball.

Screening helps us to understand how people move. Is someone struggling to move because their joint is stiff? Or is it because they lack the control or strength to move properly? Understanding this enables the coach or therapist to either work on increasing joint range, or improving strength and control. 

In some case’s where the range of movement cannot be improved, then the skill may need to be adapted to encompass the deficiency. The result of screening is being able to design a program that gets the balance of mobility, stability, strength and motor skill learning right rather than second guessing. 

So what sort of things do we look at in a screening?

What is Kinesiology?

Kinesiology is the study of human movement. It looks at how the body moves and how it can best exert forces on objects. To be a great baseballer for instance you need to be really efficient in transferring force into a baseball in order to throw or hit it hard and accurately. Understanding how the body moves will help you to train and develop skills to perform better.

In developing and mastering new skills we are required to learn new ways to move efficiently. This can occasionally be difficult for a number of physical reasons. 

Sometimes there may be a lack of movement in a joint because there is a mechanical block to the area eg. there is a tight muscle that prevents the joint from moving further. 

Alternatively, it may be that the area in question cannot move because there is not enough stability to allow for the movement to occur eg. rotation cannot occur because there is not enough stability in the surrounding muscles to control the movement.

Or it may be that there is a motor learning issue and the skill needs to be repeated to create the new pattern and the person is comfortable in moving that way.

Knowing which reason is the issue helps coaches to train the athlete better and more efficientley. 

Firstly let’s look at the type of movements that the body can do.

What types of  Body Movements are there?

Each joint in the body can move in one or more movements. For example the elbow can flex and extend and rotate in the form of supination and pronation.

Flexion/ Extension – Bending and Straightening a joint

Abduction/ Adduction- Moving a joint away or towards the bodys midline

Rotation- turning around an axis

Circumduction – turning in a conical shape around an axis. It’s a combination of all movements

Inversion/Eversion- Turning of the sole of the foot in and out. 

What are the Planes of the body?

Saggital– Moves the body fwds and back as well as up and down.  

Coronal (Frontal) – Moves the body side to side as well as up and down.

Horizontal(Transverse)  – Moves more in rotational direction but may involve up and down and a little side to side.

What is Mobility and Stability?

Baseball players must be able to create and control several different types of motion across nearly all the joints in the body. In order to do this there has to be a combination of Mobility and Stability.

Mobility relates to movement while stability relates to control. 

Stability is defined as the ability to maintain control of a joint’s movement or position by coordinating the actions of surrounding tissues and the neuromuscular system. 

Some players are “tight”. This means their soft tissues are stiffer and they may not be as flexible as others. These players generally have less mobility due to this stiffness, however they tend to be more stable. 

Stiffness can be from muscles, joint capsule and ligaments or bony blocks.

Other players may be far more ‘loose”. These players are generally hypermobile and may have issues in controlling movements. Laxity can come from muscles, joints or previous activity and injury.

Being tight or loose can be both good and bad. Being too tight can mean that movements are sluggish or not enough power can be developed across a narrow band of movement. 

However if movements are pure, and there is no power lost along the kinetic chain, tight athletes can develop a lot of power and spring. 

Being too loose can lead to  injury, and cause power to be washed out along the kinetic chain. However whippy actions can develop a lot of power and momentum when performed well. 

One way or another it’s about creating a balance between strength, mobilty and control. 

Essentially it’s a law of diminishing returns. Too much in either direction is not ideal. Finding the sweet spot for the athlete is important for maximal return. Understanding if you are a tight or loose mover can help you decide what is the best way to train. Screening helps us to work this out.

What is Neuromuscular Control?

Neuromuscular control relates to the ability of the nervous system to control a muscles activity and create controlled and purposeful movements.  Through a system of motor learning and control the body learns how to perform a task time and time again in a consistent manner.

Motor Learning is the process of developing and mastering a movement process. Motor control is the complex process involving the contraction of muscles to make a coordinated movement. It involves muscles and nerves. 

The purpose of breaking a skill down is often used in order to teach a greater movement. Feeding or starving the problem is a way that helps the brain to learn the correct patterns. Feeding the problem is where you accentuate the issue to make the body work harder to fix it. Starving the problem is where assistance is given to make the task easier to complete. Repetition of these movements help to imprint the process and make the movement automatic. 

What is the Kinetic Chain?

A kinetic chain is where the joints have effect on each other and link together to create movement. Therefore each joint has an effect on another joint’s movements.

So how does this affect me?

That’s a lot of information to take into account. 

Whilst you dont really need to know the finer details of Anatomy and Kinesiology, you do need to understand why you may be asked to do a certain drill or move in a certain way. 

Pretty simply, in order to play baseball at a high level, you need to be able to move efficiently and powerfully. 

Now not everyone is built in the same way and so not every players’ action is going to be the same. Big or small, tight or loose, movement can occur in many different forms. Look at how Mookie Betts moves compasred with Aaron Judge. 

Throw in the periods of growth that youth athletes go through, which further complicate the issues of  coordination and proprioception that need to be reprogrammed anbd you can imagine how hard it is to get a correct movement just right for you.

Therefore not everyone will benefit from the same exercise and drills. Individuals will be at different stages of physical development and therefore have different needs at different times. They will also have different body types again meaning different needs. A tall and skinny person will train differently from someone who is more compact.

What we do know is that Baseball is a power sport played in the sagittal or rotating plane. 

Power is the ability to move forcefully quickly. 

Therefore the ability to rotate powerfully is important for baseballers. 

In order to do this you require a stable base to generate the power from, and then stability up the chain ie. hips, spine and shoulder to transfer the power to the bat/ball. Knowing where a players’ deficiencies in movement and power exist along this chain is why it’s important to have screening.

It is also recommended that rotation training is commneced early in life  (12-14 years) as this will assist in maximising the potential of rotational gain patterns. Just like learning to walk we need to learn how to rotate. Even more important during these days of sitting down more and more.

Think of stretching and flicking a rubber band. It requires the ability to have a steady hand and the strength to pull it back and then let it go accurately to hit a target. Baseball is not different, it requires the ability to elongate the body and then use the generated power hit or throw the ball at a release point.

Dr Greg Rose from onBaseU discusses the importance of matching training types with the phases that an adolescant is transitioning through. ie) when someone is going through a growth phase, they should work at maximising strength training to utilise the growth hormones that are flushing through their system. As the phase settles down into growth consolidation they then transition to work on power to utilise the strength gained in the growth phase. Matching the athlete to their growth phase can be pretty complex as you can imagine.

So, you can see that being able to rotate fast is important, but how you do that depends upon your body type and the stage of life you are at. Helping you to understand the answers to these questions are why we screen. 
Do your sleeping habits impact on your performance?

Do your sleeping habits impact on performance?

How well do you sleep? Did you know that sleep, or more importantly lack thereof will have a serious impact upon your performance on the baseball diamond. Lack of sleep can come from a variety of ways. Perhaps you’ve just had a baby, you have stress at work, you are travelling to a tournament and it’s all exciting. There are many ways that sleep can be disrupted, however there are thankfully many things that you can do to help.

People have genetic dispositions to how they sleep. Some are night owls and struggle to sleep until late at night, others are known as larks. They like to rise and go to bed early. But what if the routine does not suit this? Lack of sleep creates what is called a sleep debt; for example if you need 8 hours sleep and you only get 7, then you are one hour in debt. This can accumulate over time, and needs to be paid back at some point. Too much sleep debt can have a negative impact upon your cognitive, physical and social wellbeing.

For teenagers the more sleep the better. If you have less than 5 hours sleep a night for a week, your testosterone levels will drop by 15%. This will have a severe impact on your ability for developing strength and power.

If you have an hour less sleep than you need you will have nearly 2 times more chance of injury. Sleep is also the best tool for recovery, so it will take you longer to feel better after competing or injury. You also have poorer motor learning when you are tired, so learning new skills will be more difficult. Think about that the next time you go to a tournament and you are up all night.

The latter part of the night is also where REM sleep occurs, if you are cutting this off you are losing a ton of quality sleep. So get to bed earlier if you need or are likely to wake up early.

So what are the obstacles that are preventing you from sleep? Phone and tech, noise, light, distractions and pain are some. In order to sleep well you need to first address the obstacles. Life (and Baseball) is based on routine. Make sure you have consistent sleep hygiene or patterns. Train yourself to sleep well, develop a routine. Here are some tips to help you with this.

Be consistent: Establish a consistent sleep schedule by going to bed and waking up at the same time every day. Our bodies like regularity and with a regular sleep schedule, it will naturally start to anticipate sleep.

Sleep in a cave: Make your bedroom cave-like–dark, quiet, and cool. Blackout curtains are strongly recommended. Earplugs can minimise noise, and a fan can circulate air while blocking out other noises. Cooler temperatures are better for sleep, so start at 20 degrees and decrease the temperature a few degrees each night until you find the right temperature for you.

Establish a routine: Develop and stick to a 20- to 30-minute routine before bed. Adopt a practice such as reading or listening to music so that your body knows sleep is near.

Bathroom before bed: Hydrate during the day and minimise liquids one to two hours before you sleep. Use the bathroom before bed to cut down on awakenings.

Avoid electronic screens: Stay away from TV, laptops, and video games one hour before bed. The emitted light can prevent sleep.

Avoid caffeine and alcohol: Refrain from caffeine after 3 p.m. Alcohol can prevent REM sleep and fragment sleep during the second half of the night.

Watch your diet: Cherry Juice can help; some Major League teams use this to also assist with recovery. Melatonin has varying benefits across individuals; it can work well for some but not others. Quality control can be an issue with manufacturing processes and therefore may disrupt rather than help your sleep. Avoid fatty and sugary foods just before bedtime.

For sleep only: Reserve your bedroom and bed for sleeping only. Don’t watch TV, eat, or do work in bed.

Get enough sleep: Obtaining eight to 10 hours of sleep every night, and not just before a game or competition, is critical. Ten- to 30-minute power naps provide a two- to three-hour boost in alertness and performance. Be cautious of longer naps, which can result in sleep inertia (feelings of grogginess) upon awakening from deep stages of sleep. Eliminate naps if you have difficulty sleeping at night.

Pay off your sleep debt: Chronically obtaining less sleep than your body needs builds a sleep debt over time. For optimal functioning and sports performance, you should eliminate your sleep debt by gradually extending your sleep duration, such as increasing from your typical seven hours per night to seven and a half hours for one week, then eight hours per night the following week.

Be patient: Reducing your sleep debt takes more than one night or weekend of good sleep!

So now you know how important sleep is for your baseball, are you getting enough?

Why Covid19 could be a good thing for Baseball!

When was the last time you had a break from Baseball? I treat so many players and when I ask this question, the answer is years ago, sometimes never. In Victoria with Summer rolling into Winter Seasons there is very little time to give arms a rest. Coupled with the fact that many of the better juniors are also doubling up in seniors in the afternoons, chronic loading of arms is rife. One thing with the shutting down of playing and training is that many will get some well earned rest and recuperation.

Medical Evidence recommends that arms should be rested for 3 months a year. This allows the tissues to recover from the continual micro stresses that throwing hard and frequently causes. We were made to throw; just not that hard or often. Over time, those micro stresses can become a much bigger problem resulting in injury and if you are unlucky enough surgery and a long time off the park.

But you don’t just take 3 months off and then resume from where you left off. That would be a disaster! Instead what you do is gradually work on arm care. During the resting time you can still work on your muscles. Particular attention should be paid to the muscles around the shoulder blade as they control the shoulder movement. Also work on rotational exercises and don’t forget the legs; this is where the power comes from. Exercises that build your muscles will make you sore in a good way. It’s impossible to do this and play well at the same time. Use the lockdown to smash these muscles because you may never get the chance again to have this downtime.

When it’s time to resume throwing, commence throwing shorter distances and build it out as the arm reconditions. Throwing flat grounds and pitching comes in at the end. If you do it right you will be back throwing again and you will be surprised how good your arm will feel! If you’d like more specific advice on how to resume throwing after a lockdown reach out to us at admin@staging.performanceplushealthcare.com.au

Baseball Home Exercise Programs for Isolation

It’s certainly a challenging time for all of us. With home isolation and social distancing effecting all of us in some way or form, exercise is really important for everyone; not only for our physical health but our mental health as well. Personally, I’ve set up my garage as a gym. The car no longer lives in there and it’s been replaced with yoga mats, exercise bike boxing equipment and some weights. Everyone in the house has to spend at least an hour in the “gym” or go for a walk every day. It could be a while that we are spending in hibernation, so it’s important to get into a routine. In time it will become something to look forward to for everyone. Put some music on and work out the current frustrations and problem solve your issues away whilst raising a sweat.

If you want to be a little more baseball focussed, there are things you can do which will keep you in shape for when play resumes. For some, the break may be the first you’ve had in years. Not such a bad thing for overworked shoulders, however it’s really important that you keep strong in this period and return to throwing gradually. “Arm Shock” is a syndrome where the shoulder or elbow can get injured or feel dead when a return is ramped up too quickly.

To prevent this you need to maintain arm strength and also return to throwing in a gradual and systematic process. Common exercises such as J Bands are great for keeping the arm healthy and using patterns for throwing. Also,  adding exercises that work the muscles around the shoulder blade is important to assist the shoulder in controlling the throwing action. Exercises such as rowswaiters walk, Y  Lifts, T Lifts and Bear Crawls are excellent ways to strengthen the Peri Scapular Muscles. Deceleration drills such as the Reverse Catch teach the arm to control the shoulder.

Most of the Baseballers power comes from the legs. Skater jumps and sprinting are great ways to facilitate this power. Medball throws are also another great way to develop power in rotary athletes. Then there’s the old favourites dead lifts, RDL’s and squats – there are many variations of these. A final favourite of mine is the Pallof Press; it’s a great bang for your buck exercise and harder than you think.

So get into the gym and give it a go. You’ll not only feel better for it now, but it will improve your game whenever Baseball resumes. If you want a more detailed program designed specifically for your needs and the equipment you have, email me at matt@informedica.com.au and discuss options.

Is your arm ready?

Your arm is only as fast as it can decelerate the throwing action! What does this mean? When we throw a ball hard, there is a bunch of muscles that act to slow down and stop the arm from spinning all the way around; if they didn’t it would spin around about 20 times in a second. Now we all know that is not going to turn out too well. Day to day activities combined with lots of throwing and hitting mean we can get strong in the muscles in the front of our shoulder, but the ones at the back can often be neglected. These muscles include parts of the rotator cuff and the periscapular muscles. These are the muscles that are the “fine tuners” of the shoulder and they help to control the shoulder blade. Essentially they help stop the arm from flying off when we throw something hard. Unfortunately these muscles are often over looked in exercise programs.

So most of us know that exercises like push ups, arm curls and chin ups will help us throw harder. But how do you exercise these important stabilising muscles. Exercises like J Band stability exercises and the “Throwers Ten” are great places to start. These programs feature great exercises such as Rows, Y Lifts, Shoulder External Rotation, and prone shoulder horizontal abduction. Important muscles such as Infraspinatus, Trapezius (upper and lower), Rhomboids are addressed to balance out the power of the pectorals and biceps. Additionally it is important to strengthen the core and legs. If the body drops in the action of throwing, this can make it hard for the arm to find the right slot to throw from. Our strength exercise videos outline many of the exercises you need to perform in order to throw hard.

So don’t just work on the muscles in the front of your shoulder. It might look good at the beach, but your arm will be much healthier and happier if you give a lot of attention to the shoulders at the back of the shoulder blade.

Wrist Weights: Overload Corrections

Why Wrist Weights are Useful in Throwing Sports.

Light dumbbells have been used in baseball for rehabilitation and catch-all “shoulder programs” for decades. While these modalities have their place, wrist weights do a far better job from a dual-factor perspective – they work well at generating a physiological response and also teach the body to move more efficiently through an overloaded range of motion. 

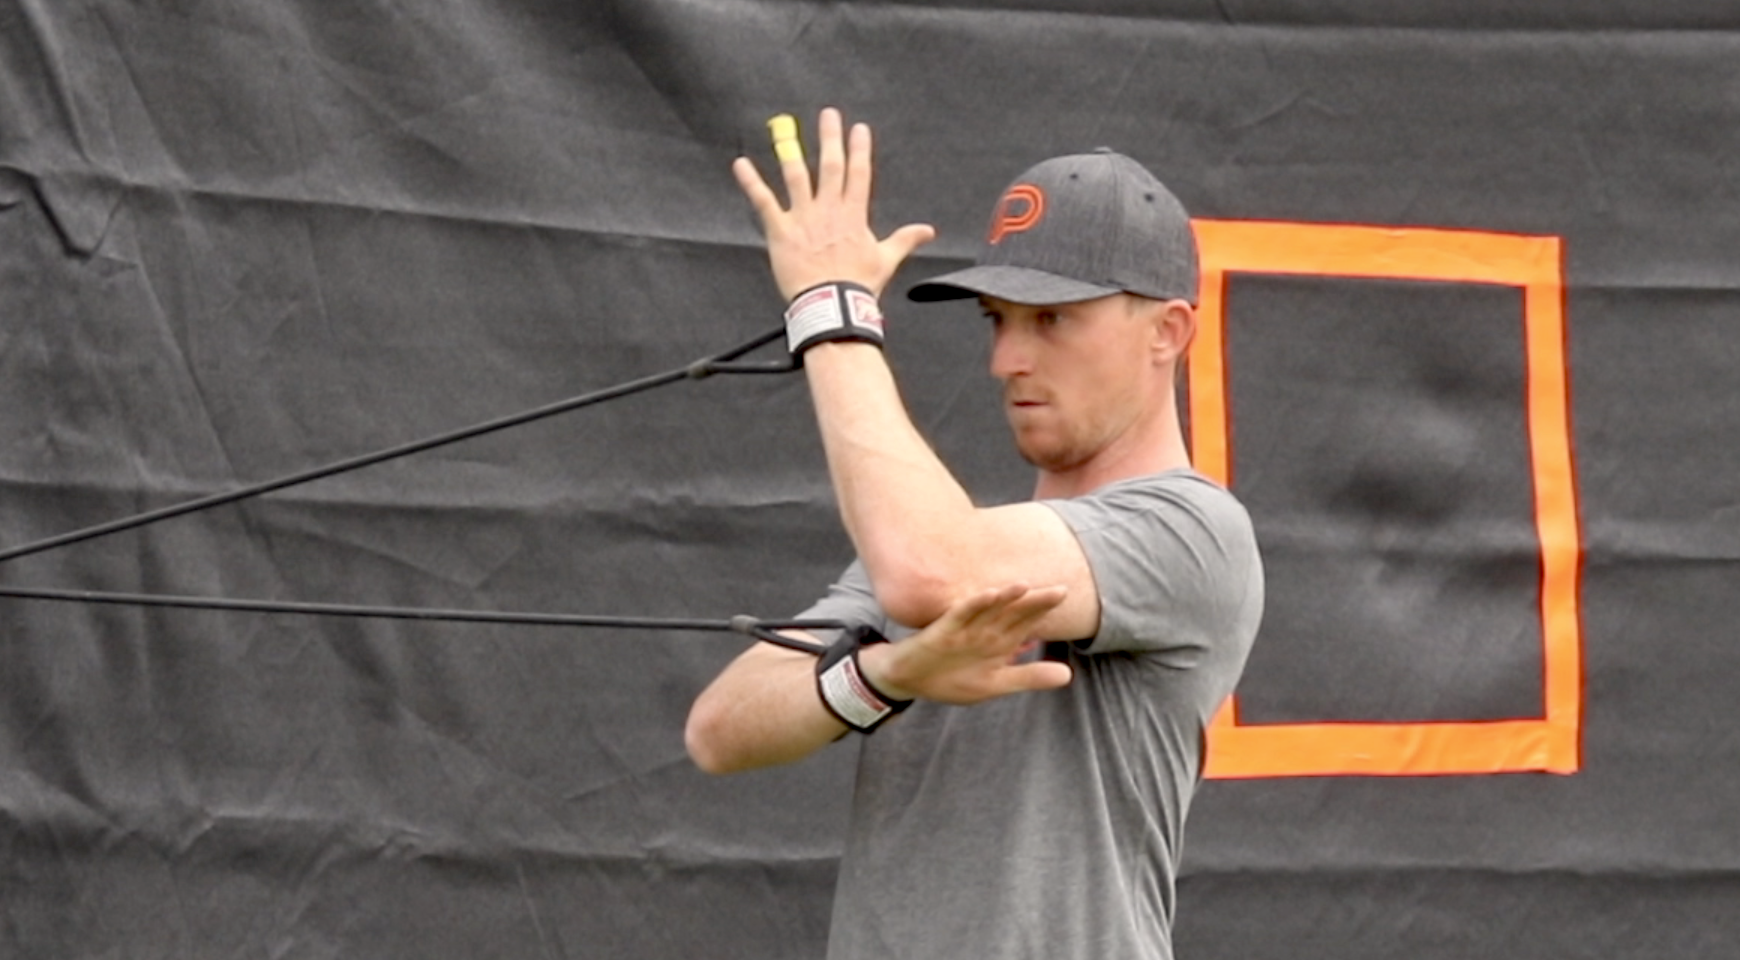
Wrist weights are “thrown” in a ballistic fashion while being loosely held in the hands. The correct grip is having the fingertips slightly over the wrist weight for support while maintaining a relaxed forearm throughout the exercise. Wrist weight drills are used to train optimal unwinding of the Driveline Phase, going from external rotation with a supinated forearm to internal rotation with a pronated forearm. 

Attempting to actively contract the elbow muscles during throwing is nearly impossible at the high speeds it occurs in.  By using overloaded implements like wrist weights, the technique can be built into the mechanical map of your neurological system, ensuring that it will be integrated into the delivery when combined with other drills provided in this course. 

By continuing to hold on to the wrist weight throughout the ballistic motions, deceleration stress is lowered as there is no separation of the weighted implement from the hand. Instead of a completely reactionary deceleration phase, the ability to feel the mechanical pattern provides very strong proprioceptive feedback – perfect for attempting to retrain human movement patterns. 

While the wrist weight is carried in external rotation and forearm layback, the shoulder is experiencing a similar inertial mass when a baseball is thrown. By simulating this end range of motion while maintaining a loose forearm, you will be able to feel how arm acceleration really occurs from that position, making wrist weights an invaluable tool in any pitcher’s training kit. 

The use of a wrist weight on the glove hand is also instructional, as an overloaded front side helps to feel the pull of the non-throwing side during the Disconnection Phase of the delivery. The quicker and more efficiently the glove arm moves around the torso while the throwing arm begins to load, the more kinetic energy becomes available while straightening out the line of force application. Think of the ideal path of the throwing arm wrist looking something like an ellipse around the torso as viewed from overhead, rather than a circle. 

Strength Training For Baseball and Cricket

Power Bands

Power bands challenge your muscles by creating resistance in multiple directions. You must stabilise against this resistance to maintain the correct movement pattern for each exercise. The result is increased strength in the targeted muscle group. As an added bonus, stabiliser and support muscles, which are often neglected during traditional training, are also strengthened. 

Pallof Press

The beauty of the Pallof press is that it challenges and strengthens the stabilisation action of your abs. That’s because when you do this exercise, it forces your core to resist the rotation or compression of your spine, which forces your entire core to engage.

Set up with a band firmly affixed about chest height to an immovable object. Stand in a line with the band apparatus and turn your body perpendicular. Centre the band on your chest using both hands. Push the band straight out in front of you, keeping your body in a straight-line with no rotation. Hold it in front for 3 seconds, then return the band in complete control to your chest. Do not allow the band to rotate your upper body back towards the machine.

Bear Crawls

Start in a kneeling position with your hands under your shoulders, and knees under your hips. Tuck your toes under, and lift your knees off the floor. Crawl forwards ensuring you keep your knees off the floor. Reverse the direction and crawl backwards. 
Try to keep your back straight throughout this movement. Try crawling to one side and then the other.

Crab Walk

Stand with your feet shoulder-width apart with a resistance band looped under each foot. Create an X by crossing the bands in front of your legs and holding the band in each hand at hip height. Take three lateral steps to the left, then repeat, going to the right.

A progression of this is to then add an arm fly to the movement as you step, by elevating and abducting the shoulders from the torso.

Kettle Bells

While kettlebells and dumbbells can both be used to train similar movements and exercises, kettlebell training has the distinct advantage of being able to produce ballistic movements more easily than dumbbells. These are movements that produce maximum velocity and acceleration over the shortest amount of time.

While the term “functional” gets thrown around a lot – and often too much – kettlebell training is functional exercise at its best. While a lot of machines and certain exercises train our muscles individually, kettlebell exercises train your body as a whole; utilising almost every muscle group working together.

This carries over directly to our lives because of our bodies rarely, if ever, use muscles in isolation, instead of working in conjunction with each other to more efficiently perform tasks, prevent injuries, and build strength. Kettlebell training trains your entire body.

Because the weight of a kettlebell is not centred like that of a dumbbell or barbell, kettlebell training can help build stability with instability.

Kettlebells teach your body to deal with an off-centre of gravity. This means that your smaller stabiliser muscles are activated more than with traditional exercises, thus making them stronger.

Aches and pains are often a result of instability and imbalances. Kettlebell training doesn’t just expose these imbalances but works to correct them through improving coordination, joint strength, and the use of low impact.In keeping the theme of our back and posterior chain, kettlebell training has the ability to improve posture, as well as spinal stability, which will help prevent injuries.

Our posterior chain is responsible for our posture. When these muscles are weak, our posture is normally poor, with our shoulders rolled forward, back rounded over, etc. Poor posture increases our risk for nagging aches and pains, as well as injuries.

Kettlebell training combats this by strengthening the entire posterior chain. A stronger posterior chain helps you keep your shoulders pulled back, with a neutral spine. This is our body’s natural position and reduces our risk of injury issues.

Kettle Row

Single arm kettlebell rows target your back, but that term covers a lot of area. The main muscles in this exercise — properly called the agonists — are your latissimus dorsi, located on the side of your upper back beneath your armpits. In addition, your middle trapezius and rhomboids, which are between your shoulder blades, are also strongly involved and can also be considered agonists.

With a kettlebell at your feet, place your left leg behind you while bending both knees. Your right knee should not extend past your toes. Lean forward at the torso and place your right forearm against your right thigh for stability. Extend your left arm and grasp the kettlebell by the handle so that your palm is facing your right leg. Bringing your elbow back, exhale as 

you raise the kettlebell to the left side of your waist. Inhaling, lower the kettlebell toward the floor and then repeat the movement.

Kettle Waiters Walk

The Waiter’s Walk is a low impact kettlebell exercise that requires a great deal of upper body strength to execute.

The technique for the Waiter’s Walk is relatively straight forward. When done properly, the exercise resembles the way a waiter at a restaurant holds a tray above their head. Beginning at a standing position with one or two kettlebells in hand, simply lift the kettlebell straight above your head, wrist facing forward, handle in the palm of your hand, and with the body of the weight resting on the back of your wrist. Once executed, simply walk forward maintaining a steady pace and keeping the kettlebell above your head. Concentrate on activating the core whilst you do this.

Progressions of this exercise involve holding the shoulder at 45 degrees from the torso and bending the elbow at 90 degrees. this will cause greater activation of serrates anterior.

Kettle Dead Lift

The deadlift adds muscle to your hips, hamstrings, glutes, and back. It also ingrains a good hip-hinge—the process of bending forward at your hips while keeping your lower-back flat and bending your knees slightly—necessary in almost every kettlebell move.

Begin in a standing position with a kettlebell held with both hands. Ensure that your back is straight and stays that way for the duration of the exercise. Allow your arms to hang 

perpendicular to the floor, with the wrists pronated and the elbows pointed to your sides. This will be your starting position.

Initiate the movement by flexing your hips, slowly pushing your butt as far back as you can. This should entail a horizontal movement of the hips, rather than a downward movement. The knees should only partially bend, and your weight should remain on your heels. Drive your butt back as far as you can, which should generate tension in your hamstrings as your hands approach knee level. Maintain an arch in your back throughout the exercise.

When your hips cannot perform any further backward movement, pause, and then slowly return to the starting position by extending the hips.

Kettle Single Deadlift

The single-leg deadlift not only develops hip strength and power, but it also allows the muscles of the hips and legs to act as stabilisers. If you think about it, every time you stand on one leg, you’re using the same muscles for balance and stability that are generally used for force production.

Forcing the body to maintain stability on one leg allows the athlete and coach to see strength imbalances from left to right side.

Hold a kettlebell by the handle in one hand. Stand on one leg, on the same side that you hold the kettlebell. Keeping that knee slightly bent, perform a stiff legged deadlift by bending at the hip, extending your free leg behind you for balance. Continue lowering the kettlebell until you are parallel to the ground, and then return to the upright position

Kettle Bicep Press with Pronation

Pick up the Kettlebell and place into the rack position, with the wrist in slight flexion. Suck the shoulder in’ to set up the shoulder before pressing, the shoulder is now ready to take load and has enough space to prevent impingement. The press will be dynamic, using slight thoracic rotation, slight shoulder abduction (around 20 degrees)this we call scaption (contraction of Scapular Plane Elevation. It refers to lifting the arms from the sides in a slightly forward alignment), but towards the end range this will come into adduction, and full shoulder flexion (which will be relative to each individual). At the wrist, we go from neutral to pronation and full elbow extension.

The lowering of the Kettlebell takes a slightly different path. Control the lowering of the Kettlebell back into the rack position. This would be full elbow flexion, back to neutral wrist (slight flexion) and only shoulder extension (no abduction) or coming through scaption.

Recovery – Stretching

Stretching before and after workouts may prevent injury and can make the difference between having a mediocre workout and a stellar one. The stretches outlined below are more dynamic and involve the muscles regularly used in baseball. Keep the following tips in mind:

  • Before you stretch, warm up by jogging for 5 minutes.
  • While stretching, relax and be patient. Take deep, full breaths to maximise results.
  • Keep your stretches static: NO bouncing or abrupt movements.
  • Optimally complete 3–5 reps of each stretch.
  • Hold pre-workout stretches for about 10 seconds.
  • Hold post-workout stretches for up to 30 seconds

Seated 90/90 Stretch

Benefit: The hips get excessively tight when the lower half is used explosively. The Seated 90/90 Stretch helps to open up the hips and correct sitting posture at the same time.

Method: Sit on a bench with your legs in front of you. Take the outside of one foot and place it at the bottom of your upper leg, just above your knee. Relax the hip and let the knee drop slightly, but not below the level of the stable knee. Place your hands on the outside of the quads on the leg you are mobilizing to gently guide the movement. Be sure to keep a neutral spine during this movement – do not round at the back. You should feel a stretch in the outside of the hip.

Cradle Walks

Benefit: The hips get excessively tight when the lower half is used explosively. The Cradle Walk is a dynamic stretch that opens up the hips like the Seated 90/90 Stretch, but with some added difficulty.

Method: Stand feet shoulder width apart. Take a step forward, bringing the knee upwards and the outside of the foot to the bottom of the quads of the stable knee. Use your hands to gently pull upwards, and do not round at the back to grasp your mobile leg. You should feel a stretch in the outside of the hip.

Wall Quad Stretch

Benefit: The quads are heavily used during the pitching motion as well as most weight training movements. Mobilizing them will ensure optimal range of motion throughout all affected movements.

Method: Stand facing a wall, bracing yourself against it with your free hand. Pull your heel into your butt and stretch your quad out; hold this position.

Ichiro Stretch

Benefit: Combining ankle and hip mobility in a deep squat position creates awareness of the importance of keeping a neutral spine.

Method: Stand feet slightly wider than shoulder width apart. Drop your butt between your legs in an unloaded squat, pointing your toes slightly outwards. Keep your heels on the ground and push your knees outwards while keeping a neutral spine and neck. Use your elbows to push your knees out to gain greater range of motion at the hips.

Cobra Pose

Benefit: Most athletes do not have a good idea of what a neutral or slightly extended lumbar spine feels like. The Cobra Pose places them in a great position to create awareness and to increase mobility at the thoracic spine.

Method: Lay prone on the ground, face down. Place your hands in a push-up position, slightly inside your shoulders’ width. Press upwards, raising your torso while your legs stay pinned to the ground. Control your breath and stay at the top position at end range of motion.

Elbow Extension Stretch

Benefit: The muscles of the forearms get tight after all throwing workouts, restricting the range of motion at the elbow and increasing the chance of injury. The Elbow Extension Stretch helps to regain mobility in the affected area.

Method: Stand tall and raise one arm in front of you, palm facing upwards. With your other hand, grab your fingers and pull the elbow and wrist into extension while straightening your elbow. You’ll feel a stretch on the top of the forearm.

Cross-Body Stretch

Benefit: This is a less aggressive stretch than the Sleeper Stretch and works as a solid alternative.

Method: While standing, reach over your glove side shoulder with your throwing arm. Gently pull your throwing elbow across your body until you feel a stretch in the posterior shoulder.

Recovery

Myofascial Care

Fascia

Muscles are covered in a film called fascia, which made up of tightly packed collagen and elastin fibers. This web of connective tissue can create knots of tissue in overused areas of the body, which is extremely common in baseball pitchers in the areas of eccentric stress – the posterior shoulder being the biggest culprit in this case. Fascial tissue contains proprioceptors which gives it the ability to sense movement and change of direction, and keeping it pliable and in good shape is critical for proper function of the body.
The Golgi tendon organ (GTO) is a mechanoreceptor that’s located where a muscle meets the tendon, and it’s responsible for reporting the tension level of that muscle/tendon pairing. The GTO autoregulates tension to limit injury to the surrounding muscle and connective tissue, and by rolling across the tissue using a foam roller or Lacrosse ball, you can stimulate the GTO to help your muscles relax.

Self-Myofascial Release: Foam Rolling and Trigger Point Work

Self-Myofascial Release (SMR) is a tried and true method that helps to reduce adhesions in muscle tissue and allows your muscles to relax. We’ll be using two tools to get the job done, plus one optional tool for increased focus:

• Foam Roller

• Lacrosse (LAX) Ball (you can use a baseball)


A foam roller is great for body parts with large surface areas – your legs or upper back, for example. But for those hard to reach places, a LAX ball is what you need most. If you want to free up the posterior shoulder, glutes, and forearm, you need trigger-specific tools.

For all of the exercises listed in this chapter, you’ll want to determine the duration of the movement on your own. For the first few times you go over the tissue, you’ll probably experience serious tightness and possibly even pain. Be sure to go slow and roll out the tissue gradually, spending a lot of time on the “hot spots” you find. We’re looking for chronic positive changes over time, not necessarily acute benefits by beating yourself up on the first day! As you become more experienced with SMR techniques, you’ll know how long you’ll want to go to get the desired effects. For the beginners, a good rule of thumb is spending at least two passes across the affected area at a slow pace for a total of 15-30 seconds.

Hamstrings

Definition: The hamstrings are a group of muscles and tendons that are primarily responsible for flexing the knee and extend the hip. Their secondary function involves medially rotating the hip inwards.

Benefit: By keeping this muscle group pliable and free of adhesions, it ensures consistent stride direction, stride power, lead leg blocking strength, and lower half rotation.

Method: Use the foam roller to roll between the hip and knee

IT Band + Tensor Fascia Latae (TFL)

Definition: The iliotibial (IT) band supports movement around the knee. It often gets tight in athletes who move explosively laterally and therefore is a prime target for SMR. The tensor fascia latae (TFL) and surrounding musculature aids hip flexion, hip adduction, and hip internal rotation. The TFL is connected to the IT band.

Benefit: By keeping the IT band free of adhesions, knee pain is far less likely to occur. Quality of the blocking phase will go up if the IT band works properly. By keeping the TFL freed up, lateral explosiveness can be retained without risking strains in the lower half. If lateral knee pain is present, rolling out the TFL and IT bands should be the main targets.

Method: Use the foam roller to roll across the IT band. If adhesions continue, light trigger point work with a LAX ball may be necessary.

Quadriceps

Definition: The quadriceps are responsible for knee extension and hip flexion.

Benefit: By rolling out the quads on a regular basis, ideal hip flexion can be achieved in the delivery, ensuring good forward trunk flexion.
Method: Use the foam roller and The Stick to get deep into the muscle group.

Calves / Lower Legs

Definition: The calves and the muscles of the lower legs are responsible for movement at the ankle and knee. There are multiple groups of muscles, but they can all be hit in a few passes of a foam roller with creative positioning of the lower leg!

Benefit: By rolling out the lower legs, good flexibility and mobility of the ankle and knee is retained, optimizing the stride phase and blocking phase of the delivery.

Method: Use the foam roller and The Stick to get deep into the muscle group, rotating the lower leg as you go through the entire area. A LAX ball may be required for deeper areas or especially hot zones.

Glutes

Definition: The glutes dominate total hip movement, including extension, abduction, and external rotation.

Benefit: By rolling out the glutes, a neutral and slightly extended lumbar posture is easier to maintain throughout the delivery, reducing the chances of lower back pain. Additionally, force is better transmitted through hip extension and rotation if the glutes are firing properly.

Method: Roll out your butt with a foam roller and a LAX ball in specific tight areas.

Plantar Fascia

Definition: Plantar fascia connects the toes to the Achilles tendon.

Benefit: By rolling out the bottom of the foot, ankle mobility stays high. Since the plantar fascia starts all movement that requires extension of the lower half, it’s a critical area to keep pliable.

Method: Take your shoes off and roll the bottom of the foot with a LAX ball.

Triceps

Definition: Triceps extend the elbow, one of the most critical movements in the pitching delivery.

Benefit: By rolling out the triceps on a regular basis, range of motion is maintained at the elbow which promotes a healthy arm and proper transmission of force in the last movement in the kinetic chain before ball release.

Method: Pin a LAX ball against a wall or on the ground and bend the elbow tightly. Roll at the insertion of the triceps by the elbow and hunt for tight spots. Use a foam roller to get a more general sliding surface reaction if you like.

Pecs / Chest

Definition: Pectoralis major/minor are responsible for horizontal adduction and internal rotation of the shoulder and often get tight in all baseball pitchers regardless of mechanical efficiency.

Benefit: By rolling out shortness in the pecs, posture will improve and optimal internal rotation will be available during the Driveline Phase of the delivery. Anterior shoulder stress will be reduced if the pecs are properly supporting the shoulder-scapular complex.

Method: Lay on the ground and pin a LAX ball in the pecs, rolling out and hunting for tight spots.

Latissimus Dorsi (Lats)

Definition: The lats have a huge cross-section and support deceleration of the arm as well as internal rotation, extension, and adduction.

Benefit: By rolling out the lats, it becomes much easier to maintain a low elbow position during the Pickup Phase of the delivery. Pitchers who have trouble with the elbow climbing too high generally have tight lats to go with mechanical inefficiencies.

Method: Roll the entire lat surface out with the foam roller or a LAX ball to get into the hot spots.

Medial Scapula Crest

Definition: The posterior shoulder stabilizes the shoulder joint and supports internal rotation.

Benefit: By mobilizing the medial scapula crest, the rotator cuff will work significantly better, producing better velocity and reducing the chance of soft tissue injury around the shoulder.

Method: Pin a LAX ball between your scapula and spine on the ground or against a wall and roll up and down, hunting for tight areas. Stabilize the LAX ball in various spots, reaching overhead and across the body to mobilize the shoulder.

Thoracic Spine (Upper Back)

Definition: The thoracic spine is the middle/upper vertebrae in the spine.
Benefit: By mobilizing the thoracic spine, the torso is free to rotate quickly – one of the biggest components of ball velocity.

Method: Roll from the mid-back to the base of the neck using a foam roller, but do not roll the lower back (lumbar spine).

Teres Minor / Infraspinatus

Definition: The teres minor and the Infraspinatus are two muscles of the rotator cuff that actively externally rotate the shoulder. These muscles also support deceleration of the pitching arm in the delivery.

Benefit: By mobilizing this group, keeping the forearm laid back in MER during the Driveline Phase will become easier and deceleration will be optimized during the Recovery Phase.

Method: Pin a LAX ball between the bottom of your shoulder blade and the floor while you lay on your back. Actively take your arm through external and internal rotation while the LAX ball is pinned, then hunt around for tight areas by moving your torso around.

Forearms

Definition: The forearm flexors and extensors help protect the elbow during the pitching delivery, absorbing a significant amount of force the ulnar collateral ligament (UCL) would otherwise take on.

Benefit: By mobilizing this group, the supination to pronation transition during the Driveline Phase will be significantly easier. By restoring a pliable surface in the flexor-pronator bundle, stress will be reduced on the UCL and the posterior bony structures of the elbow.

Method: Pin a LAX ball between the wall and your forearm and apply a lot of pressure by leaning into it. Roll the forearms out. If you need more work, pin The Stick against a power cage / squat rack and roll your forearm down the surface of The Stick while pronating and supinating at the forearm to capture the entire area.

Medial Scapula Myofascial Release

The Medial Scapula Border Myofascial Release is part of the Performance Plus Stretching Series. This stretch can be done 2 ways. You can do it lying on a ball placed on the inside border of your shoulder blade between it and the spine. Bend your knees up and use your feet to rock back and forward on the ball. Alternatively, lean against a wall with a ball in the same spot. Gently bend up and down on your knees to perform the release.

Posterior Shoulder Myofascial Release

The Posterior Shoulder Myofascial Release is part of the Performance Plus Stretching Series. Lie on your side with your arm out in front of you. Place the ball at the back of your shoulder and find the tight point. You can then rock bak and up and down on the spot. Alternatively you can move your arm up and down above your head.

Lats Myofascial Release

The Latissimus Dorsi Myofascial Release is part of the Performance Plus Stretching Series. Lie on your affected side on a mat with your knees bent. Place a ball or foam roller under your arm, just below the arm pit. Stretch your arm out on top, turning the palm upwards. Keeping your hips on the floor, use the strength through your legs to move the foam roller from just below your arm pit, in to your upper arm. If you feel any tender spots, hold the position there.

Pectoral Myofascial Release

The Pectoral Myofascial Release is part of the Performance Plus Stretching Series. Lie down on your stomach with your arm  up and out tot he side. Take the ball and put it underneath the muscle at the front of your chest, near your shoulder. Rock the body forward and back over the ball. From that position you can also move your arm in a sweeping motion above the head. Return the arm to the starting position and repeat. Make sure to stay strictly on the soft muscular part of the chest.

Verified by MonsterInsights