The Seated 90 Stretch is Part of the Performance Plus stretching Series. Its really effective at stretching out the hips which can get really tight from baseball. To perform the stretch, Sit upright in a chair. Cross the ankle of the affected leg over the opposite thigh just above the knee. Lean forwards, bending from the hip. Increase the stretch by placing your hand on the inside of the affected knee, and apply some downwards pressure. Do not round your back whilst you hold this position. Hold for 20 seconds and repeat 3 times each leg.
Reverse Throw Drill

The Reverse Plyo Throw is part of the Performance Plus Strengthening Series. Reverse Throws train the posterior shoulder, activating the muscle group but also providing a strong physiological stimulus to develop power. Reverse throws also provide a good backwards-chained mechanical stimulus, which helps the athlete develop kinesthetic awareness of how the pitching arm is delayed in the delivery. While kneeling on the throwing-side leg and the glove-side leg out in front, assume a forward position across the body with the PlyoCare ball in your throwing hand. Your throwing forearm should be pronated and your scaps should be protracted with shoulders forward. Initiate the movement by rotating towards your throwing arm side, driving the shoulder backwards and around the spine. Keep the hand pinned to the body as long as possible until inertial mass pulls it behind you in a backwards throw as you supinate your forearm into neutral posture. Drive the glove-side midfoot into the ground, anchoring the hips. The feeling is a powerful backhand slap to someone directly behind you! Try to mimic your normal arm slot when doing this drill. Repeat 10 times.
Plyoball Pivot Pick

The Pivot Pick video is part of the Performance Plus Strength and Conditioning Series. They are really useful in teaching the arm to create an effective throwing motion. While standing perpendicular to a solid surface with your throwing arm side facing the target, grip a PlyoCare ball in the throwing hand. Start in the high-cocked position with the forearm slightly supinated. Initiate the throw by pulling the glove-side shoulder around the spine, folding the glove arm downwards and close to the side of the ribcage. Roll the throwing elbow into the driveline by raising the elbow upwards as the mass of the PlyoCare ball pushes the forearm back into layback. Drive the chest forward and unwind the throwing arm by pronating the forearm during internal rotation. Finish with the throwing shoulder forwardly rotated to the target; the ideal throwing arm path will have the throwing hand hit the throwing arm side pants pocket. Do your best to not finish across the body. This drill trains internal rotator and elbow extensor strength, shoulder mobility, and forearm pronator-flexor dynamic strength. Video of this drill must be reviewed on a regular basis to make sure the athlete is forwardly rotating the torso, pronating the forearm correctly (throwing curveballs and sliders with 1kg PlyoCare balls is not uncommon when first starting this due to poor awareness of forearm positioning), and driving the chest forward to maximize linear and rotational velocities.
Plyocare Rocker Drill

The Rocker Throw video is part of the Performance Plus Strength and Conditoning Series, this drill emphasizes the linear momentum and the importance of the lead leg block. Stand with a PlyoCare ball in the throwing hand, facing away from the target with the glove side pointing at the target. Rock forwards into the glove side leg, then backwards into the throwing side leg, then explode off the back leg while putting force into the ground with the lead leg. Throw the PlyoCare ball as usual to a mid-chest high target, driving off that lead leg. Rocker Throws help the athlete feel how the strong lead leg block contributes significantly to torso rotation.
Wind Up Drill
The Walking Windup drill is part of the Performance Plus Strength and Conditioning Series. Walking Windup Throws are a progression off the Roll-In Throws, which teaches the unwinding of the lower half and how it contributes to the upper half. By using a step-step-rotate pattern, the athlete begins to understand the interconnection between ground reaction forces, hip rotation, and torso rotation in the delivery. This drill is done with lighter PlyoCare balls to more closely mimic the actual delivery. Stand with a PlyoCare ball in the throwing hand, facing the target. Step with your glove side foot, then plant the throwing side foot into the ground as you bring the glove side foot up into the drifting “balance” position. Lean the torso back slightly as you drift through the traditional balance position, using the momentum of the step to continue through the linear portion of the delivery. Begin striding to the plate and unwind the counter-rotation that was initiated earlier in the delivery, then throw the PlyoCare ball to a mid-chest high target.
Roll In Throw

This video is part of the Performance Plus Strength and Conditioning Series. Roll-In Throws are a progression beyond Pivot Pickoff Throws, as it involves a dynamic movement with the lower half. The drill was designed to minimise lower half rotation and maximise upper half torso stacking and rotation, as these are the real mechanical keys to throwing high velocities. Stand facing the target with a PlyoCare ball in your throwing hand at waist level. Take a walking step with your throwing side leg with minimal hip rotation, then drive powerfully off this leg leaning your torso slightly backwards as you do so. Bring the PlyoCare ball into the high cocked position using your standard arm action, and as your glove side leg makes contact with the ground, separate your glove and throwing side shoulders by pulling the glove shoulder around the spine and drive the chest forward. This will lay the throwing arm back in external rotation. Unwinding the arm in internal rotation, elbow extension, and forearm pronation, throw the PlyoCare ball to a target approximately mid-chest height. Focus on forwardly rotating the torso and gaining “extension” to the target.
Long Toss with Kinetic Chain Exercises
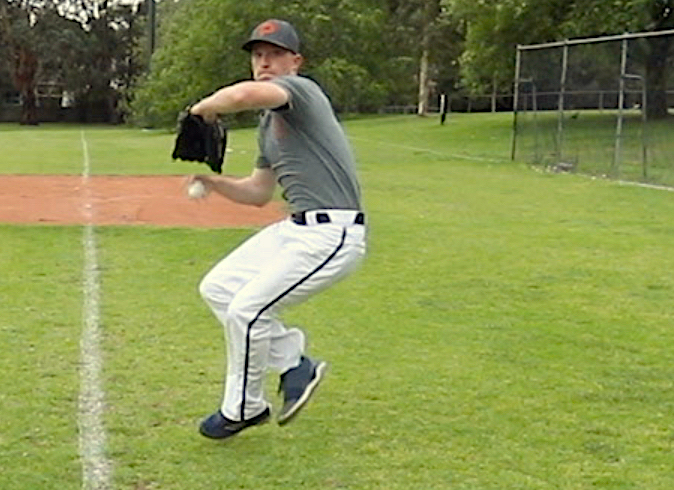
Long Toss using Driveline Constraint Exercises
This video shows the technique used for Driveline Kinetic Chain throwing exercises. Using a normal baseball or cricket ball (not weighted ball at this stage), we demonstrate the Pivot Pick, Rocker, Roll In and Walk-In WindUp Exercises to develop throwing techniques.
Commence about 5 m apart facing each other and loosen the arm with 10 stationary feet warm up throws. We then commence the Extension Phase. First we commence with 5-10 Pivot Pick throws aiming for the chest of your partner. Once completed take 5 steps back and perform 5-10 Rocker Throws. Take 5 Steps back and then perform 5-10 Roll In Throws. Finally we progress to the Walk In Wind Up Throws. Here every 2 throws you will take 5 steps back until you reach the designated distance or your limit (when the ball is making a shot hop). Remember as we extend out we are throwing nice and loosely and the ball will travel at a gentle arc.
Once we reach our distance limit, we commence the Compression Phase of the long toss exercises. Here we aim to throw the ball flat and hard straight to our partner.. With each throw step in 5 steps aiming to throw each time as hard as the previous throw and on the same flat plane. Keep progressing this until you close to a distance that remains safe and comfortable for both partners.
Assessment Throwing Velocity

The Throwing Velocity Video is part of the Performance Plus Screening Series. Throwing velocity can be measured in many ways. our preferred way involves using a pocket radar and standing behind a net in alignment with the thrower and measuring the speed of the throw. Take the average of 3 throws. Make sure the player has suitably warmed up prior to this test.
Assessment Bat Exit Velocity

The following video on Bat Exit Velocity is part of the Performance Plus Screening Series. To measure Bat Exit velocity you will need a radar. We suggest the Pocket radar. Its important to use the same radar for all testing to maintain consistency. To measure have the Radar about 4 meters behind the contact point. Its really important to have the radar facing the path of the ball flight (so the radar will be angled slightly upwards.) Take the average of 3 hits.
Screening Broad Jump

The Standing Broad jump is part of the Performance Plus Assessment and screening series. The standing broad jump is similar to the standing vertical jump and is tested at the NFL Combine as a premier metric for power and speed-strength. To test, simply stand on a marked line with your feet pointing forward with the toes on the line. Jump. The final measurement is done at the heels, not the toes – so it’s from your toes at the starting position and the back of the heel at the landing position. Test this 2-5 times until you get your maximum distance, then record it for future use.
Screening Lateral Jump

The Lateral Broad jump is part of the Performance Plus Screening Series. The standing lateral jump is similar to the standing broad jump except you will be standing sideways when you execute this unilateral jump. If you are right- handed, turn so the edge of your left foot touches the starting line, then swing your left leg across your body and explosively push off your right leg. Land on your left leg and plant. Remain standing. The ending measurement is done off the outside edge of your left foot. (Reverse for left-handed pitchers.) The point is to explosively drive laterally off the posting leg in the delivery. Give it a few shots and record your best for the day.
FABER Assessment
The FABER test assessment is part of the Performance Plus Assessment Series. To execute the FABER test, lay on your back and bring your right knee to your stomach/chest. Externally rotate your hip by moving the knee sideways towards the ground and place your right ankle just above your left knee. Lower your right knee toward the ground without “hiking” your hips in a compensatory motion. To pass the FABER test, the knee must be close to the floor (about 2-4 inches) while lying flat on your back and without over-rotating around your hips. Repeat for each leg.
J Band Shoulder Stability with Retraction
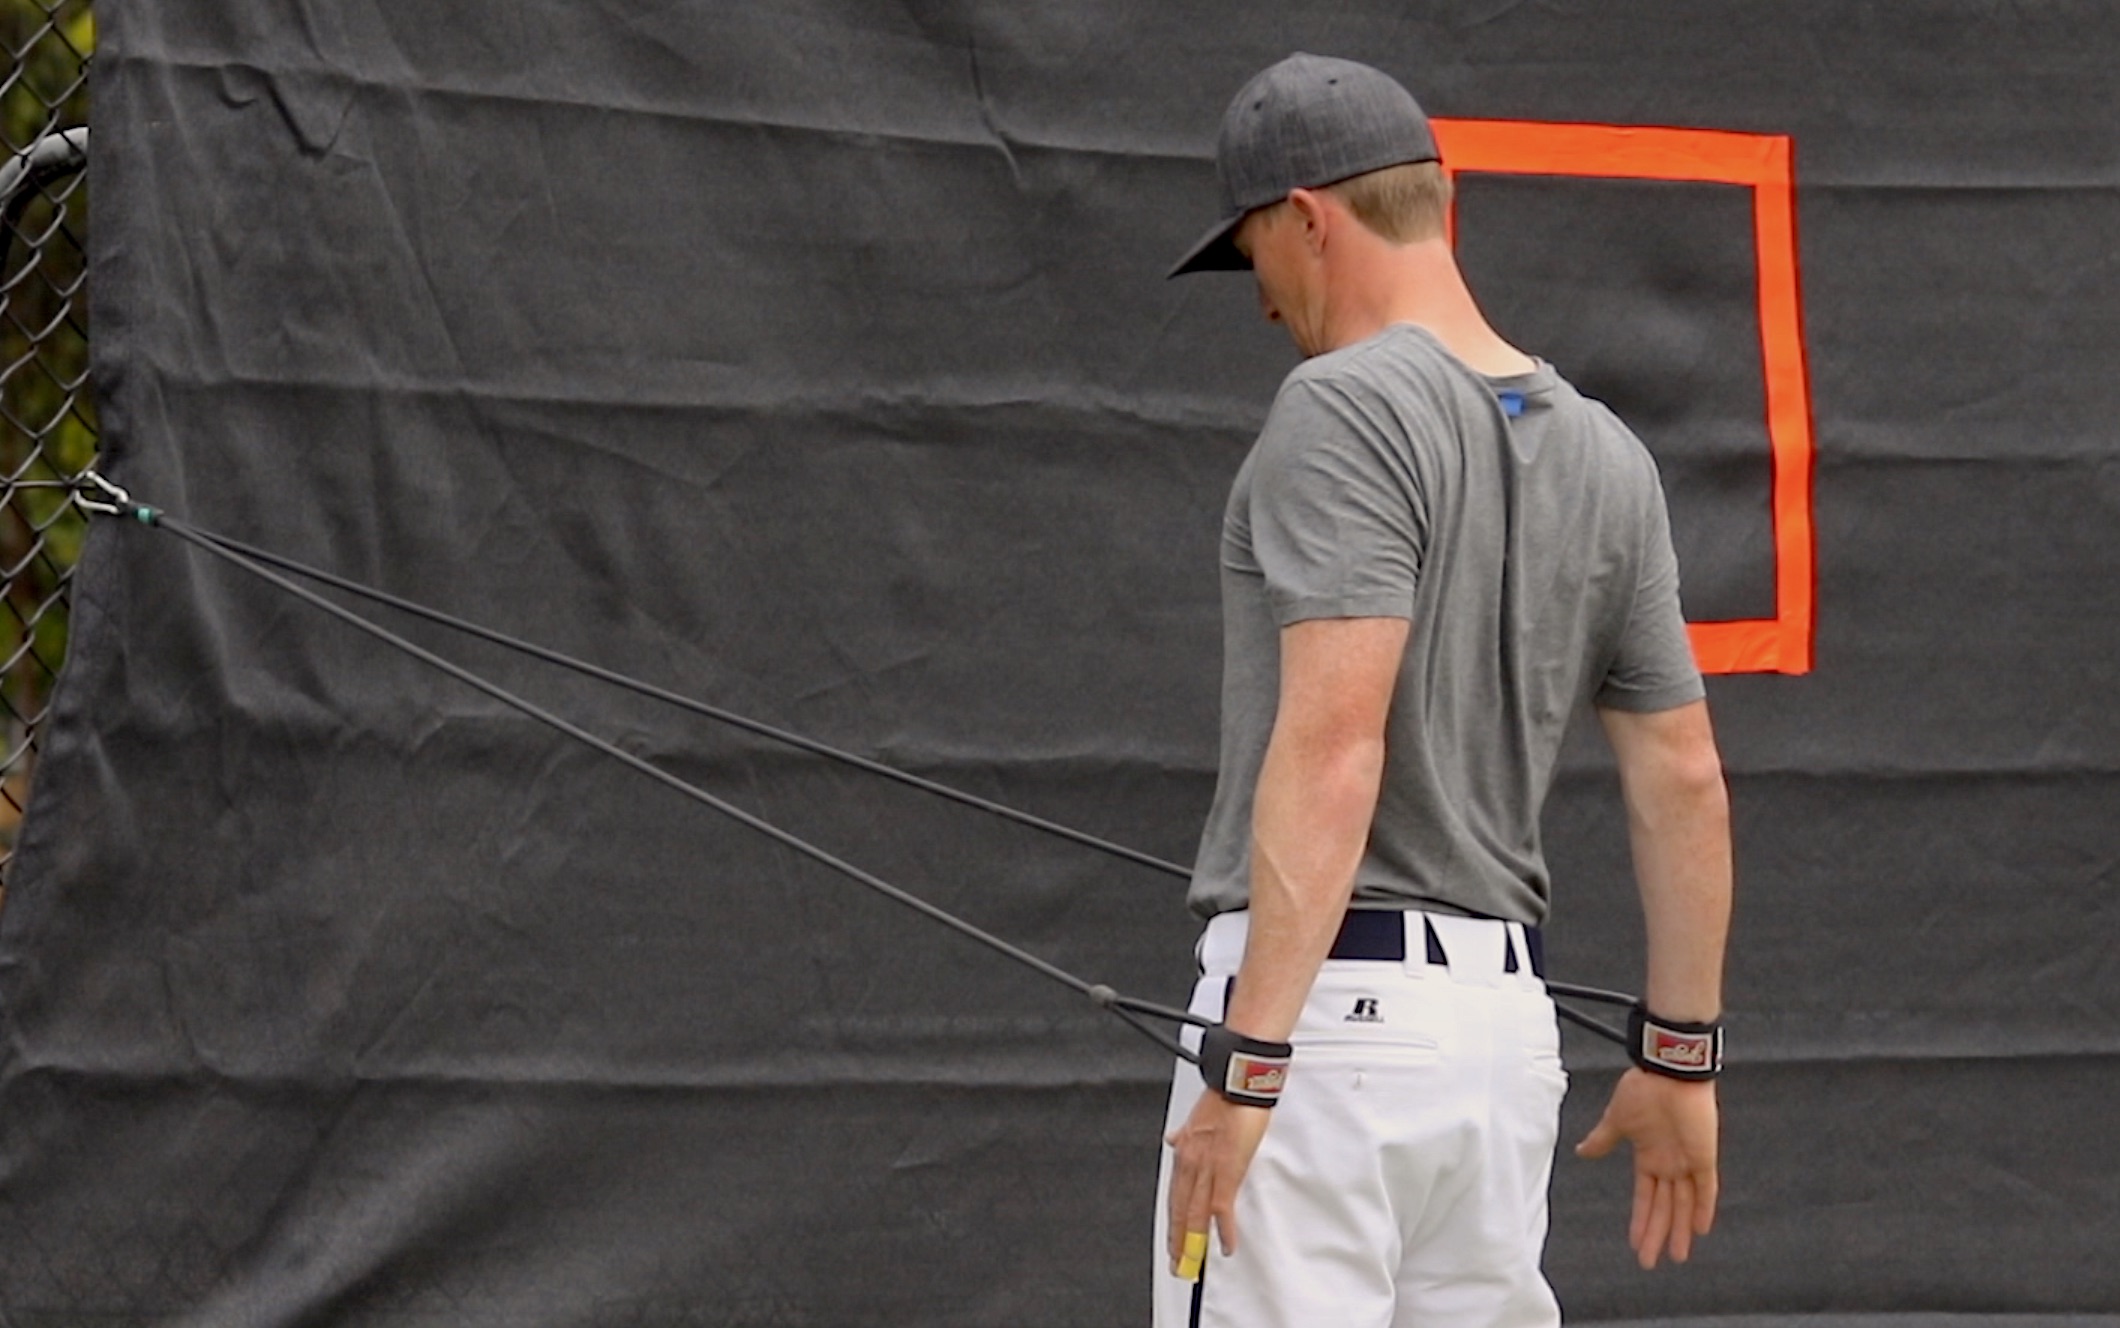
This Video is part of the Performance Plus J Band Warm-Up Series. The Scapular Stability with Shoulder Retraction Exercise is a good dynamic stability exercise to assist with control of the shoulder blade. Work at keeping the shoulder blade back and snug as you pull your arms back. As with all the band exercises try and maintain trunk control as you perform the exercises. Best done as 3 sets of 10.
J Bands Biceps Curl With Supination
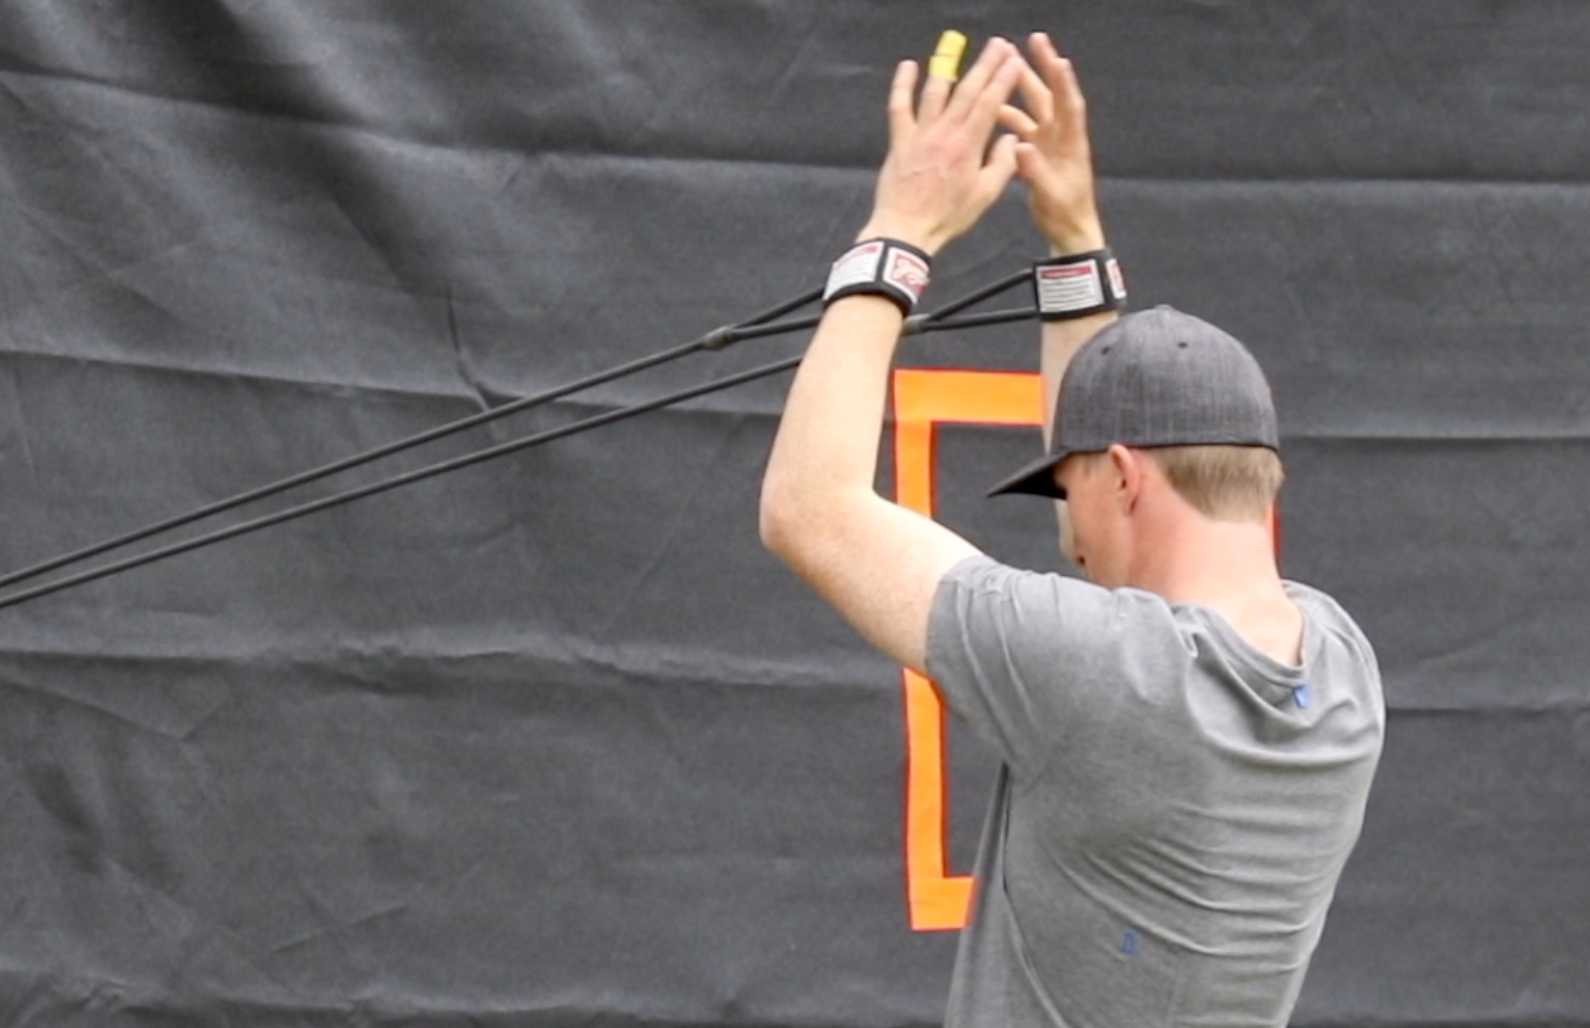
This Video is part of the Performance Plus J Band Warm-Up Series. The Bicep Curl with Supination is a good exercise to strengthen and control Elbow and Shoulder Flexion as well as Wrist Supination. It is really useful in improving the throwing action. Commence in an athletic position with facing the bands and your palms facing backwards. Smoothly bend your arms in front of you at the same time turning your hands so that your palms are facing over your shoulders. Return slowly in a controlled manner to the starting position remembering to turn the hands so that now the palms are facing behind you. As with all the band exercises try and maintain trunk control as you perform the exercises. Best done as 3 sets of 10.
J Bands Front Fly Exercises
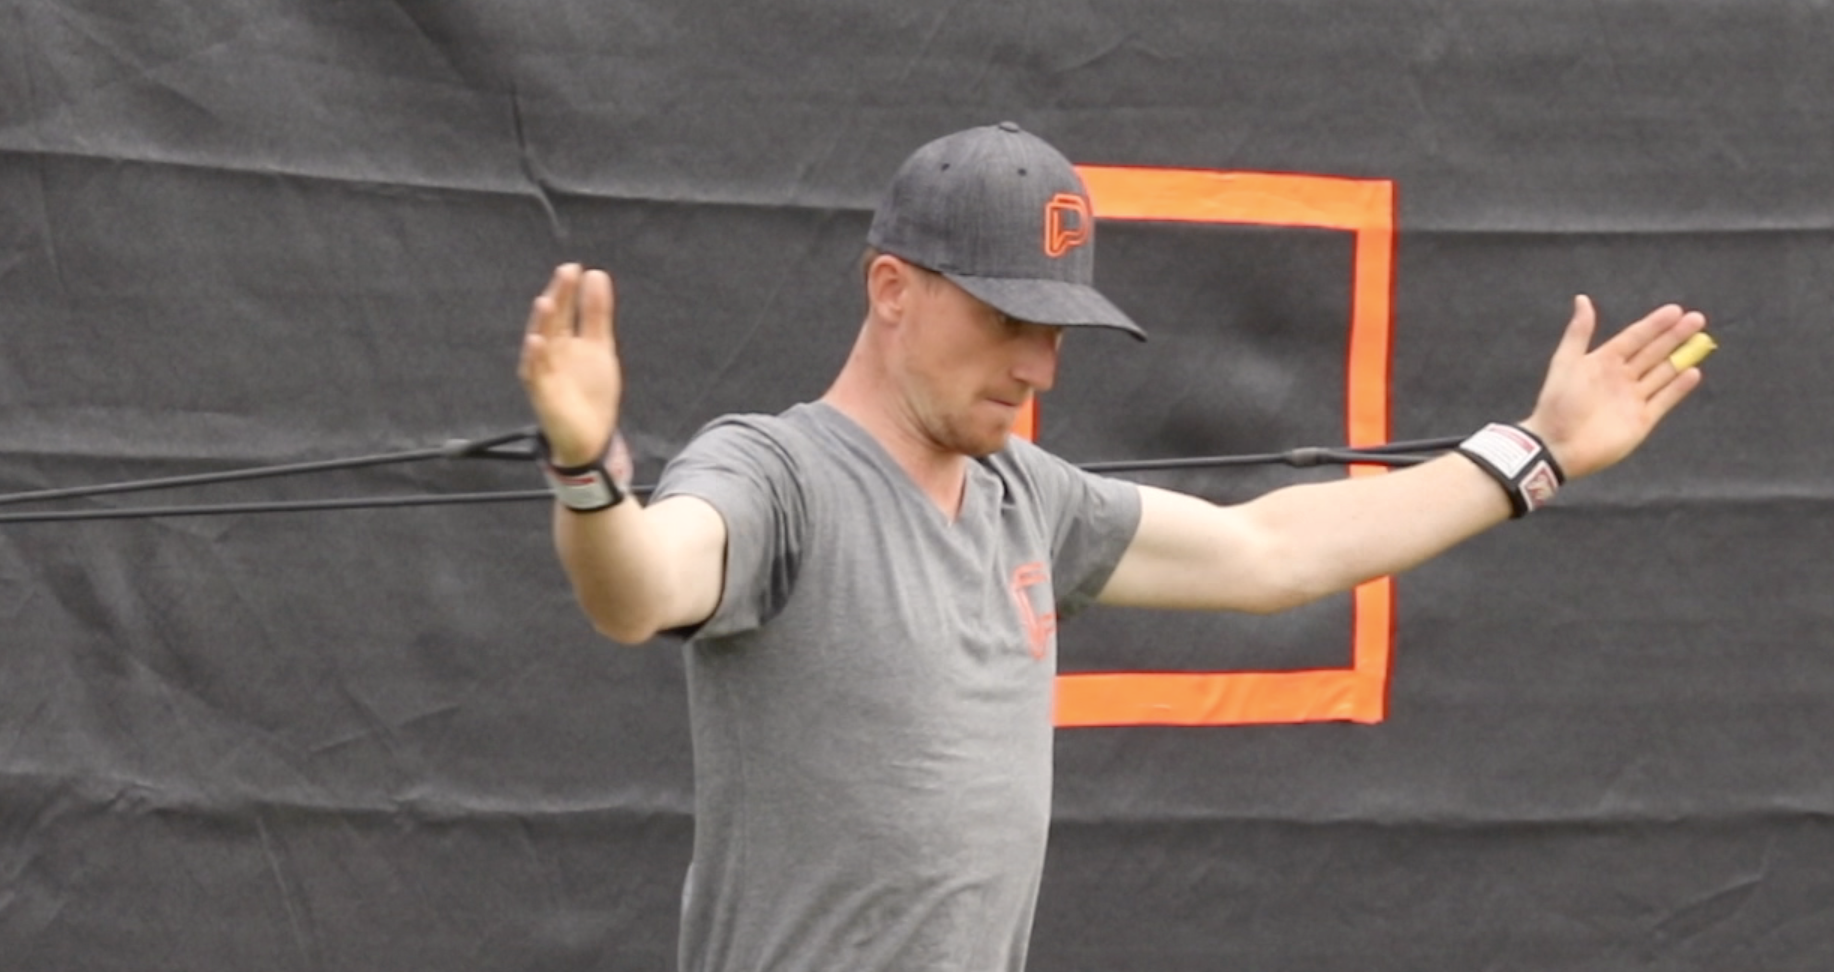
This Video is part of the Performance Plus J Band Warm-Up Series. The Front Fly with J Band is a good exercise to strengthen and control shoulder movement. It is a really important exercise for the throwing action and helps to stabilise the shoulder blade. Commence in an athletic position face on to the bands. Commence with the shoulder elevated at 90 degrees with out to side. Bring the hands together and then drive then straight up above the head. Ensure you keep the shoulder blades snug during the action. Slowly return to the chest before returning to the starting position. As with all the band exercises try and maintain trunk control as you perform the exercises. Best done as 3 sets of 10.